
Get your FREE 30-day trial.
Please complete all fields.
If you've spent time with the Salesforce Console, you'll know that this alternative view of Salesforce has a lot of power under the hood. That power comes from features like standard record layouts, workspaces, sidebar and footer components, keyboard shortcuts, push notifications, presence, macros and multi-monitor mode. Combined, they result in significant improvements in agent efficiency (up to 40% in basic use cases) and your bottom line.
However, these features also have myriad configurations. Where do you start? What is the best way to bring them together for the business needs of your organization? This blog gives you tips on how to configure and get the most out of your Console. We'll start with a blank slate and build our way up to a full deployment.
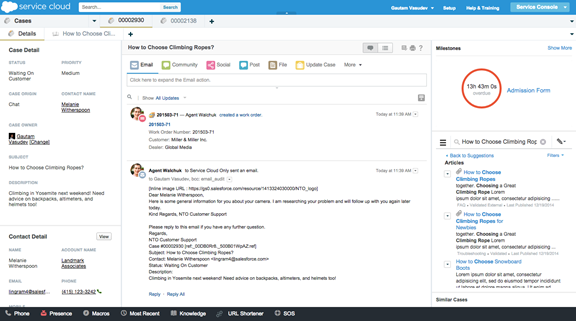
A configured Salesforce Console.
We usually think in terms of a few steps when setting up a Console. I would like to address each of these in details. Unfortunately that makes for a very long write up. In order to make it digestible, we'll cover the steps in the 3 separate blogs.
So let's get started …
This isn't related to configuring a Console, but it's sound advice. You might have a number of processes that you need to support. It's important to identify which ones you would like to enable in the Console first. This can vary from customer to customer. For example:
In each of these, there are some flows or processes that are more important than others. In the case of the first, responding to a password reset request might constitute 40% of inbound emails. Therefore it's a use case we must prioritize.
Once you have the top 5 flows, lay them out as described later in Step 2. It's more than likely that you will have well over 5 use cases. However, start with these 5 or so. Once you've got them down and have a rich Console experience around them, you'll realize
- You have your most important flows covered
- Adding more flows becomes a question of iterating on the existing flows
- While the complexity of flows increase, it's rare that you have to revisit the entire Console design
For the sake of simplicity, this blog is going to focus on helping the first customer, who is trying to setup email response in the Console. For this, the flows identified were
Now that we have these flows, we can lay them out visually. This helps map them to Console features down the line.
We now want to create views for our top flows. In the case of our example, we have an easy start.
Flows 1 and 2 need an email response mechanism, with which an agent reads an email and responds to it. This is central to everything the agent is doing. It's also the same irrespective of what type of email the agent is responding to.

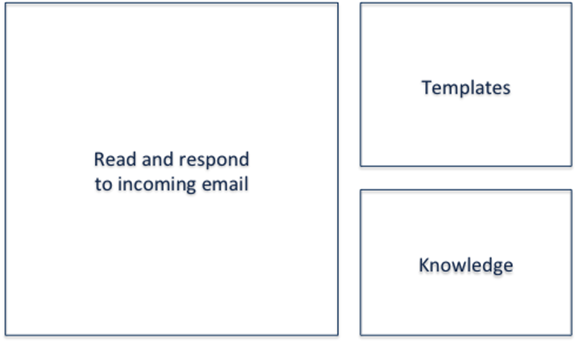
For Flow 3, we probably want the email templates and knowledge articles alongside the email response mechanism itself. The agent must be able to select a template and view a knowledge article to respond to the customer. While viewing the knowledge article, the agent mustn't lose context of the case.
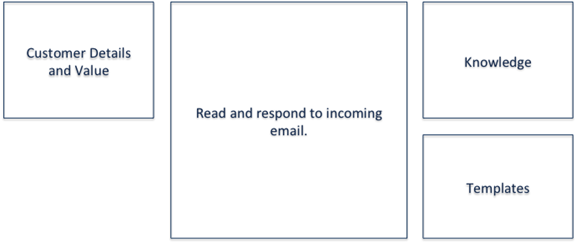
Flow 4 should allow our agents to understand the customer context. Here's what it could look like. The customer details would be available on the left of the email. If we had a concept of customer value, we could show it here as well.
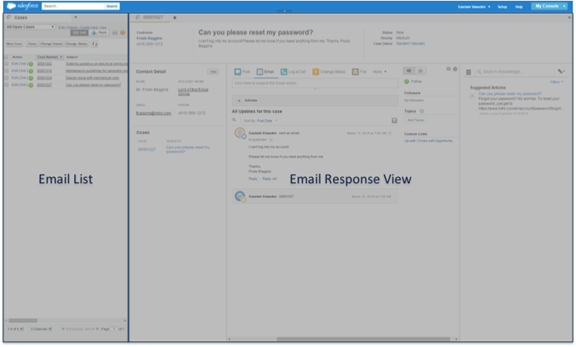
For flow 5, we have two options. We could go from the agent's list of emails to a particular email. Or we could place an incoming email alongside the list of emails. Both are shown below. Let's first group everything we discussed thus far into an "email response view". This is shown below.
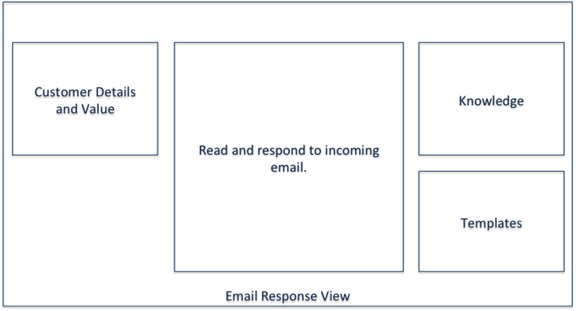
Now that we have our email response view, the user could go to it from their email list with a click.

Alternatively, we may desire that users can see the email list and the email response view side by side.
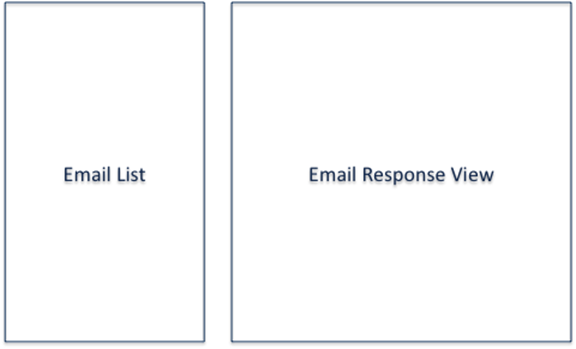
Creating views doesn't require detailed visualization. The goal of this step is to identify and assemble the building blocks, so don't get bogged down by details. It's hard to put the puzzle pieces together when you don't know what the end result looks like.
Input from your UX team is always helpful and this is a good time to seek it, but don't let it hold up the next steps. At the end of this step you should know what you are looking for. The next step is where vision meets reality and we translate the views into actual Console layouts.
When creating views in the Console, there are number of factors to consider. Let's walk through them.
In the Console, the main customer record (interaction) is opened in a tab. Every link opened from this main record is opened as a child tab of this main "primary" tab. The combination of a primary tab and "sub" tabs is called a "workspace". Thus agents work in workspaces, and every customer interaction (email, call, chat etc) gets its own workspace. You are now going to create workspaces that match your views.
For our use case, the easiest way to bring emails into salesforce support is via the email-to-case feature (E2C). With E2C, incoming emails generate Salesforce cases. The case is presented to the agent via the Case Feed which has rich email response capabilities, and email templates built in. The "primary tab", then, is the Case Feed representation of the email. This is shown below. Any information opened under this, such as a knowledge article or contact information would be a subtab of this case.
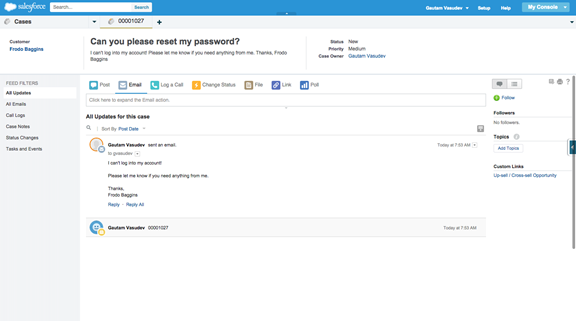
A Case Feed Primary Tab
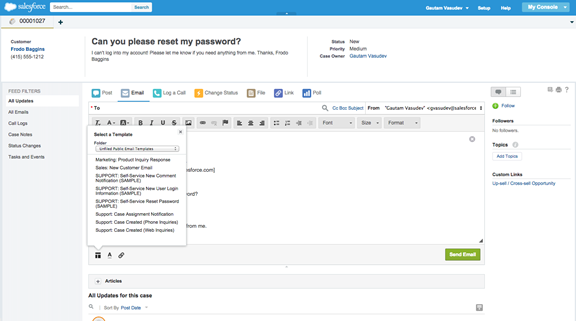
Email Templates in the Case Feed
Sidebar components are additional information that can be displayed alongside tabs in the Console. These are contextual. The information they show is specific to the record in the tab that they are placed alongside. You can learn more about sidebar components here.
There are a number of sidebar components available out of the box. For our scenario, we need two components. The first is a way to view knowledge articles and attach them to email responses. This is done with the Knowledge One sidebar component. The component automatically shows articles related to the case based on case information. You can see it on the right of the case in the screenshot below, showing an article on resetting passwords.
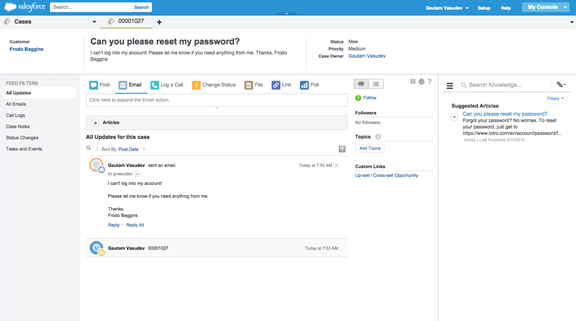
Adding a Knowledge Sidebar
Next, we wanted to get customer details alongside the email view. This can be done via the "Lookup" component. It gives us details on the customer. You can see it below on the left. You can customize the fields shown in this component. It's also inline editable.
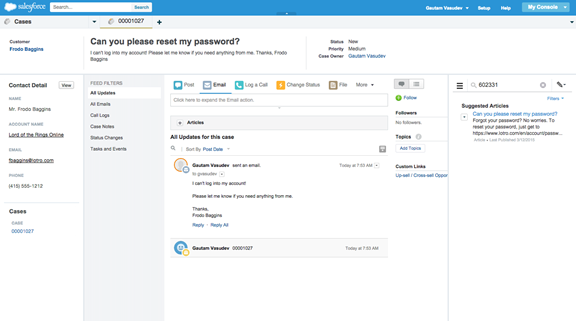
Adding a Lookup Component to the Case Contact
There are other sidebar components which can be used to build rich workspaces, allowing your agents understand the customer 360 at a glance.
The list of components grows every release, so be sure to check out the release notes for updates around them.
Thus far we have addressed what the email response view (workspace) looks like. Let's move on to an agent's view of their work items list (the list of emails that an agent has to answer). The Console allows multiple ways to do this.
A work list in the Console can be displayed full screen.
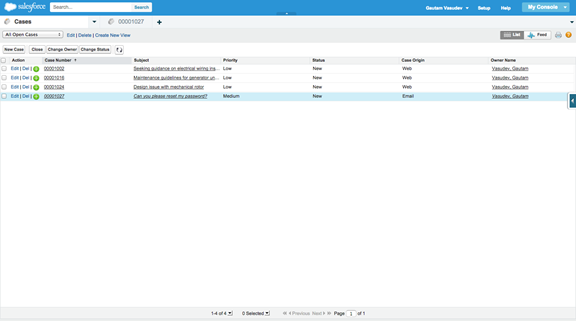
A full width List View.
Or the list of work items can be pinned alongside the actual work, horizontally or vertically. In the case our email response example this would look like the screenshot below. You can see how the list of incoming email cases is show on top. Click on a particular case, it opens below the list. This is similar to other email clients. The screenshot following shows a vertical orientation.
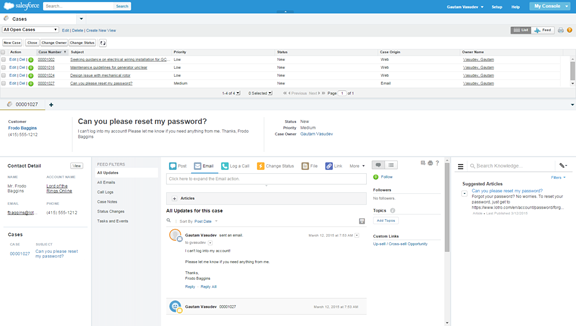
A Horizontally Pinned Work List
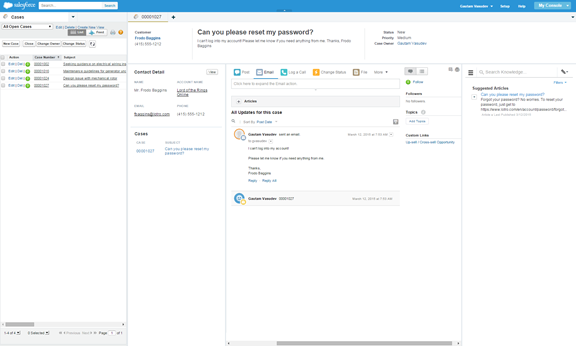
A Vertically Pinned Work List
This last Console layout closely reflects our desired agent view. You can see the list of work items and the email response area with its components. It's now almost ready for agents to start using and responding to customers! In the next sections we'll iterate on this.
In this post we looked at how to approach setting up a Console. This starts with prioritizing and focusing on the most important flows. Once you layout the flow at a high level and have a sense of the views required, you can begin translating them into the Console.
In Part II of this blog series we look iterating and refining views/ workspaces. This means following the best practices around them. There are a number of items to consider, such as screen real estate, scannability, information density, hiding data behind a click, performance, push notifications, creating custom versus standard functionality and pulling in external data.
In Part III we'll look at how to make your power users even more productive. We'll focus on advanced Console functionality like keyboard shortcuts, the history component, macros, branding and custom components like notes and links.